Ninja Transfers offer an innovative solution for heat pressing and DTF technology, providing efficient and versatile tools for transferring custom designs onto fabrics with precision and ease.
Overview of Ninja Transfers
Ninja Transfers are a cutting-edge solution for custom heat pressing and DTF (Direct-to-Film) technology, offering a seamless way to apply vibrant designs onto fabrics. Known for their efficiency and versatility, they are widely used in heat pressing due to their high-quality results and ease of application. These transfers are suitable for various fabrics and designs, making them a popular choice for both hobbyists and professionals.
Popularity in Heat Pressing and DTF Technology
Ninja Transfers have gained significant popularity in heat pressing and DTF technology due to their high-quality results and ease of use. Their DTF cold peel transfers are particularly favored for their vibrant colors and durability. Many users highlight their reliability and consistency, making them a go-to choice for custom apparel and fabric projects. This popularity stems from their innovative approach and user-friendly instructions.

Preparing for the Transfer
Ensuring proper preparation is crucial for successful transfers. Gather all necessary materials, set up your heat press correctly, and verify the image alignment and settings before proceeding.
Materials Needed
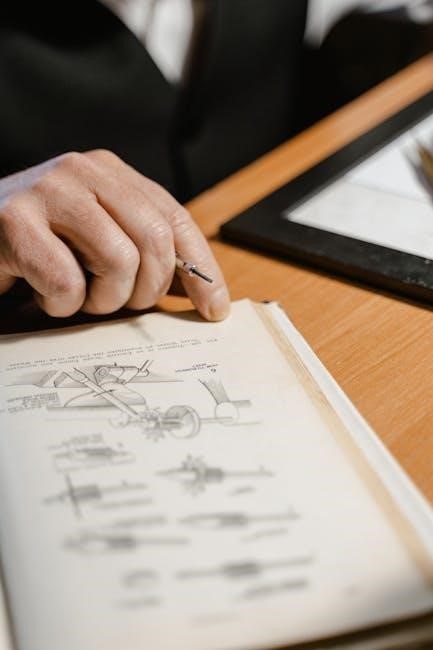
To begin, gather essential materials like DTF transfers, a heat press, parchment paper, and a laser printer. Ensure you have compatible fabrics, such as cotton or polyester blends. Proper tools like a weeding tool and thermal tape can enhance accuracy. Always organize your workspace for efficiency and safety during the transfer process.
Setting Up the Heat Press
Preheat the heat press to 310°F (155°C) with medium to high pressure. Ensure the platen is clean and dry. Use parchment paper to prevent transfer sticking. Test settings on a scrap fabric first to optimize results. Proper calibration ensures even heat distribution, crucial for successful transfers. Always refer to manufacturer guidelines for specific adjustments.
Image Preparation
Ensure the image is mirrored before printing, as it will be reversed on the fabric. Use high-quality inkjet paper designed for transfers. Print at the highest resolution for crisp details. Allow the ink to dry completely before handling to prevent smudging. Proper alignment and scaling ensure the design fits perfectly on the fabric. Always test on a sample press first.
Step-by-Step Instructions
Follow a structured process to ensure successful transfer application, covering placement, pressing, and peeling for optimal results.
Placing the Transfer
Ensure the transfer is placed correctly on the fabric, aligning the design precisely. Position the paper with the image facing down, smoothing out any air bubbles or wrinkles. Use a flat surface to avoid misalignment. Center the design on the garment for a professional finish. Double-check the placement before pressing to ensure accuracy. Proper alignment is key for a flawless result.
Heat Pressing the Transfer
Set the heat press to 310°F (155°C) with medium to high pressure. Place the transfer on the garment, ensuring the image is face down. Press for 12 seconds, using parchment paper to prevent direct contact. Avoid overloading the press to maintain even pressure. Smooth out any air bubbles during pressing. Allow the transfer to cool slightly before peeling. Proper heat pressing ensures a vibrant, long-lasting design.
Peeing the Transfer
After heat pressing, allow the transfer to cool slightly before peeling; Gently lift the paper to ensure the image adheres to the fabric. Use a cold peel method for best results. Avoid stretching or pulling too hard, as this can distort the design. If the image doesn’t transfer fully, reapply heat for a few seconds and try peeling again. Proper peeling ensures a crisp, professional finish.
Common Mistakes to Avoid
Common mistakes include incorrect temperature settings and insufficient pressure, both leading to poor transfer quality. Avoiding these ensures crisp, durable designs.
Incorrect Temperature Settings
Incorrect temperature settings are a common issue, often leading to failed transfers. Using too low a temperature may result in incomplete adhesion, while excessive heat can damage materials. Ensure your heat press is calibrated to the recommended temperature, typically between 300°F and 320°F for most DTF transfers. Always refer to the specific guidelines provided with your Ninja Transfer product to achieve optimal results. Proper temperature control is essential for achieving vibrant, long-lasting designs.
Insufficient Pressure
Insufficient pressure during heat pressing can result in incomplete transfer adhesion, causing parts of the design to peel off easily. Ensure your heat press applies consistent, firm pressure across the entire transfer area. Medium to high pressure is typically recommended, depending on the material. Always test a small sample first to verify the pressure settings for optimal results and durability of the transferred design.
Troubleshooting Common Issues
Encounter issues with image transfer or peeling? Check temperature settings, pressure, and fabric type. Adjust heat press settings and test samples for optimal results.
Image Not Transferring Properly
If the image isn’t transferring properly, ensure the heat press temperature is set correctly, typically between 300°F to 320°F. Verify that the design is printed in reverse and that the transfer paper is placed correctly. Check for even pressure distribution and sufficient pressing time. Test on a sample fabric first to identify and resolve issues before applying to the final product.
Peeling Issues
Peeling issues often occur due to incorrect temperature or pressure settings. Ensure the heat press is calibrated and the transfer is pressed at the recommended temperature and time. Using parchment paper can help prevent sticking. Allow the transfer to cool slightly before peeling slowly and evenly. Testing on a sample ensures optimal results and minimizes peeling problems during the actual application process.

Tips for Professional Results
For professional results, calibrate your heat press and test samples. Use high-quality transfers and follow temperature guidelines. Ensure proper alignment and even pressure for consistent outcomes.
Calibrating the Heat Press
Calibrating your heat press ensures accurate temperature and pressure settings. Start by preheating the press to the recommended temperature, typically between 300°F and 350°F for most transfers. Use a temperature gun to verify the heat plate’s consistency. Adjust the pressure knob to achieve even distribution, ensuring it’s firm but not overly tight. Proper calibration prevents under-heating or over-heating, which can damage the transfer or fabric. Regularly check and recalibrate the press to maintain optimal performance.
Testing with a Sample Press
Before applying transfers to your final product, test your heat press settings using a sample fabric. This ensures the temperature, pressure, and time are optimal. Place a small transfer on the scrap material and press according to the guidelines. Check the results to confirm the image adheres properly without peeling or discoloration. Adjust settings as needed for professional-grade results. This step saves time and materials by identifying issues early.
Pressing Multiple Layers
For intricate designs requiring multiple layers, press each layer sequentially. Start with the base image, then add subsequent layers, ensuring proper alignment. Apply moderate pressure and temperature, allowing each layer to cool before adding the next. This method prevents shifting and ensures vibrant, professional results. Always test layering on a sample press to refine technique and achieve desired outcomes.
Always use protective gear, including gloves and goggles, when handling heat presses and transfers. Keep the work area clear and avoid loose clothing to prevent accidents. When working with heat presses, always handle high-temperature surfaces with care. Use heat-resistant gloves or tongs to avoid burns. Ensure the heat press is placed on a stable, heat-resistant surface and keep it away from flammable materials. Regularly inspect the press for worn-out parts to maintain safety and efficiency. Never leave the press unattended while it is in operation. Always wear protective gear when using heat presses to ensure safety. Heat-resistant gloves protect hands from burns, while safety goggles shield eyes from debris. A well-ventilated workspace prevents inhaling fumes. Proper equipment ensures a safe and efficient transfer process, minimizing risks associated with high temperatures and mechanical operations. This protective approach is essential for achieving professional results consistently. Ninja Transfers are versatile for various fabrics, including hoodies, hats, and canvas. They work well on different materials, expanding creative possibilities beyond traditional apparel applications. Transferring designs to hoodies and hats requires careful consideration of fabric thickness and texture. Use a heat press with adjustable pressure to accommodate seams and curved surfaces. Preheat the garment to ensure even temperature distribution. For hats, use a heat-resistant tape to secure the transfer in place. Adjust pressure and temperature settings as needed for optimal results on thicker fabrics. Ninja Transfers can be applied to various fabrics, including cotton, polyester, and blends. For best results, test compatibility by pressing a small sample first. Adjust temperature and pressure settings according to fabric thickness and type. Delicate materials may require lower heat, while denser fabrics need higher pressure. Always use parchment paper to protect the transfer and ensure a smooth application. A small apparel business doubled its production efficiency using Ninja Transfers, achieving crisp, vibrant designs on various fabrics with minimal waste and consistent results. A small apparel business successfully used Ninja Transfers to produce vibrant custom designs on hoodies, hats, and various fabrics. They achieved consistent results with minimal waste, leveraging DTF technology for sharp, durable prints. This approach streamlined their production, allowing them to expand their product line and meet growing customer demand efficiently.
Proper calibration of the heat press and adherence to temperature guidelines are crucial for optimal results. Testing designs on sample materials beforehand ensures minimal errors. Consistent pressure application and precise timing prevent peeling issues, enhancing the durability of transfers. These insights highlight the importance of following detailed instructions for achieving professional-quality outcomes with Ninja Transfers. Ninja Transfers simplify the heat pressing process, offering high-quality results for both beginners and professionals. Their innovative approach ensures durability and vibrant designs across various materials. Ninja Transfers provide a seamless solution for DTF and heat pressing, ensuring vibrant and durable designs. Proper preparation, including materials and press setup, is crucial for success. Following step-by-step instructions and avoiding common mistakes like temperature and pressure errors leads to professional results. Testing samples and calibrating equipment enhance outcomes, making Ninja Transfers ideal for various fabrics and applications beyond traditional t-shirts. Ninja Transfers are a game-changer for crafting custom designs, offering simplicity and precision. Whether you’re a hobbyist or a professional, their tools and guides make achieving stunning results easy. With versatile applications and consistent quality, Ninja Transfers empower creators to explore endless possibilities in fabric decoration, ensuring satisfaction and success in every project.Safety Precautions
Handling High Temperatures
Using Protective Gear

Applications Beyond T-Shirts
Transferring to Hoodies and Hats
Using Different Fabrics

Case Study: Success with Ninja Transfers
Real-World Examples
Lessons Learned
Encouragement to Try Ninja Transfers