This comprehensive guide helps users set up and operate the Yamaha RX-V367 AV receiver, covering installation, connections, features, and troubleshooting for optimal performance.
1.1 Key Features and Capabilities of the Yamaha RX-V367
The Yamaha RX-V367 offers 4K Ultra HD and High Dynamic Range (HDR) support, ensuring stunning video quality. It features HDMI ARC for seamless audio return, 3D video pass-through, and wireless connectivity options like Bluetooth and Wi-Fi. With Dolby Digital Plus and DTS-HD Master Audio, it delivers immersive surround sound. The YPAO calibration system optimizes audio settings, while multi-zone control allows independent audio playback in different areas.
1.2 Purpose of the User Manual
This user manual is designed to guide users in understanding and utilizing the Yamaha RX-V367’s features effectively. It provides detailed instructions for installation, configuration, and troubleshooting, ensuring optimal performance. The manual also helps users explore advanced settings and maintain their device, making it an essential resource for both setup and everyday use.
1.3 Supplied Accessories and System Requirements
The Yamaha RX-V367 comes with a remote control, power cable, and other essential accessories. Ensure your system meets the requirements, including HDMI-compatible devices and a stable network connection for wireless features. Verify all components are included and compatible before setup to ensure smooth operation and full functionality of the receiver.
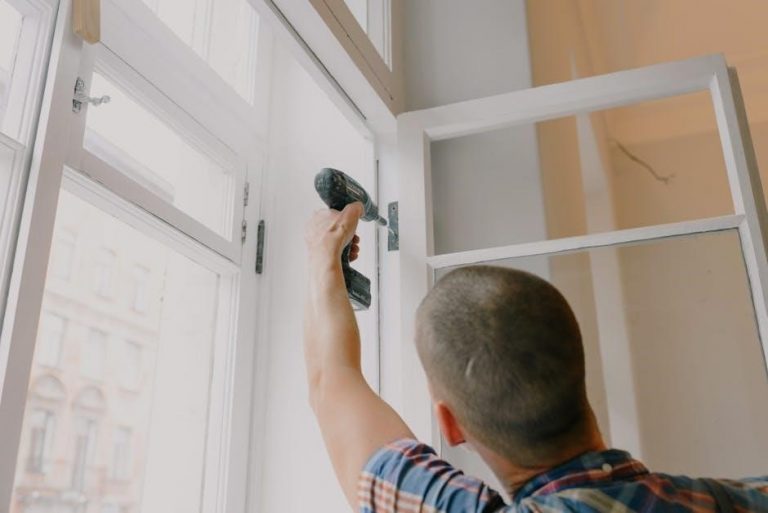
Installation and Basic Connections
Start by placing the receiver on a stable surface and connecting the power cable. Next, connect your speakers and HDMI devices, ensuring proper configuration for optimal performance.
2.1 Unpacking and Physical Installation
Start by carefully unpacking the Yamaha RX-V367 receiver, verifying all included accessories are present and undamaged. Place the unit on a flat, stable surface in a well-ventilated area. Avoid direct sunlight and moisture to prevent damage. Handle the receiver with care to avoid scratches. Connect cables securely to the correct ports, ensuring no overloading. Proper installation ensures optimal performance, longevity, and safe operation of the device.
2.2 Connecting Speakers and Subwoofer
Connect your speakers to the Yamaha RX-V367 by matching the color-coded terminals on the rear panel. Ensure correct polarity by aligning positive (+) and negative (-) terminals. For the subwoofer, use the dedicated LFE (Low Frequency Effects) jack or a mono RCA cable. Set the impedance to 8 ohms and secure all connections firmly to avoid signal loss. Proper cable management ensures optimal audio quality and prevents interference.
2.3 HDMI and Analog Input Connections
Connect HDMI devices to the HDMI 1-4 ports using high-speed HDMI cables. For analog inputs, use RCA connectors for audio and component or composite video inputs. Ensure all cables are securely plugged into the correct jacks on the rear panel. Configure input settings via the on-screen menu to assign the correct signal type for each connected device, ensuring proper audio and video synchronization.
Remote Control Operations
The remote control provides intuitive control of the Yamaha RX-V367, with buttons for power, volume, input selection, and navigation. Use it to adjust settings and switch modes easily.
3.1 Remote Control Layout and Functions
The remote control for the Yamaha RX-V367 features a logical layout with buttons for power, volume, input selection, and navigation. Dedicated buttons for HDMI, DSP modes, and Scene selections simplify operation. The remote also includes a numeric keypad for direct input selection and a backlight for easy use in low-light environments, enhancing overall control and convenience.
3.2 Programming the Remote for Multi-Device Control
The Yamaha RX-V367 remote can be programmed to control multiple devices. Use the learning function to assign commands from other remotes to specific buttons. Access the learning mode, assign commands, and test functionality. This feature enhances convenience by allowing seamless control of your entire home theater system from a single remote, streamlining your entertainment experience.
Audio and Video Configuration
This section guides you through adjusting audio output modes and video settings to optimize your home theater experience, ensuring enhanced sound and visual quality.
4.1 Setting Up Audio Output Modes
Learn how to configure the Yamaha RX-V367’s audio output modes, including Stereo, Surround, and Enhanced settings. Adjust speaker configurations, enable audio processing features, and optimize sound quality. Use the remote to navigate the MENU, selecting the desired audio mode. Refer to the manual for detailed steps to ensure the best sound experience tailored to your home theater setup.
4.2 Configuring Video Output Settings
Configure the Yamaha RX-V367’s video output settings by adjusting resolution, HDMI output modes, and picture quality. Access the MENU to select HDMI settings, ensure proper display calibration, and enable features like 3D pass-through. Refer to the manual for detailed steps to optimize video output for your TV or projector, ensuring a high-quality visual experience tailored to your setup.
Advanced Features and Settings
Explore advanced settings like HDMI ARC, CEC control, and 3D video pass-through. Customize audio and video enhancements to optimize your home theater experience with precision and ease.
5.1 Utilizing HDMI ARC and CEC Functions
HDMI ARC allows audio to be sent from the TV to the receiver without additional cables, while CEC enables control of connected devices with one remote. These features simplify setup and enhance home theater functionality; Enable ARC and CEC in your TV settings for seamless audio and synchronized device control, ensuring an optimized entertainment experience.
5.2 Enabling 3D Video Pass-Through
To enable 3D video pass-through on the Yamaha RX-V367, ensure your HDMI settings are configured correctly. Connect a 3D-compatible TV and Blu-ray player to the receiver. Navigate to the HDMI setup menu and enable “3D Pass-Through” to maintain the 3D signal without upscaling. This ensures a direct 3D video output for an immersive viewing experience.
Network and Wireless Connectivity
This section explains how to connect the Yamaha RX-V367 to your home network and set up wireless audio streaming for seamless music playback from compatible devices.
6.1 Connecting to a Home Network
Connect your Yamaha RX-V367 to a home network using an Ethernet cable or Wi-Fi. For wired connections, use the LAN port. For wireless, select your router’s SSID, enter the password, and ensure WPA2 encryption is enabled. Use the Yamaha app for streamlined setup. Check the receiver’s menu for network settings and run diagnostics to ensure a stable connection. Update firmware if necessary for optimal performance.
6.2 Setting Up Wireless Audio Streaming
Enable wireless audio streaming by connecting your Yamaha RX-V367 to compatible devices via Bluetooth or Wi-Fi. Pair your smartphone, tablet, or computer by selecting the receiver from the device’s Bluetooth or Wi-Fi settings. Use Yamaha’s optional YBA-10 Bluetooth receiver for enhanced connectivity. Ensure devices are within range and properly paired for uninterrupted audio streaming. Restart devices if pairing fails.

Troubleshooting Common Issues
Resolve common issues like no sound, distorted audio, or HDMI connection problems by checking connections, restarting devices, and ensuring firmware is up-to-date for optimal performance.
7.1 Diagnosing No Sound or Distorted Audio
Check all speaker connections for tightness and correct polarity. Ensure volume is not muted or set too low. Verify the input source is selected correctly.
Reset equalizer settings to default if audio is distorted. Update firmware to resolve software-related issues. Consult the manual for detailed troubleshooting steps or contact Yamaha support for assistance. Regular maintenance ensures optimal performance.
7.2 Resolving HDMI Connection Problems
Check HDMI cable connections for secure fits and damage. Restart the receiver and connected devices to reset the HDMI handshake.
Ensure HDMI-CEC is enabled on compatible devices. Update firmware for improved compatibility. Consult the manual for specific troubleshooting steps or contact Yamaha support for further assistance. Regularly inspect cables and ports to maintain reliable connections and optimal performance.

Maintenance and Firmware Updates
Regularly clean the receiver and check for firmware updates to ensure optimal performance. Restart the device after updates for proper installation. Follow manual guidelines for care.
8.1 Cleaning and Care Tips
Regularly clean the Yamaha RX-V367 with a dry, soft cloth to prevent dust buildup. Avoid harsh chemicals or abrasive materials that may damage the finish. Ensure the unit is placed on a stable, well-ventilated surface to prevent overheating. Handle the receiver with care to avoid physical damage, and keep it away from direct sunlight or moisture. Follow these guidelines to maintain optimal performance and extend the product’s lifespan.
8;2 Updating the Receiver’s Firmware
To update the Yamaha RX-V367 firmware, visit the official Yamaha website and download the latest version. Transfer the firmware file to a USB drive, then insert it into the receiver. Navigate to the system menu and select the firmware update option. Follow on-screen instructions to complete the process. Ensure the receiver remains powered on during the update to avoid interruptions. Regular updates enhance performance and add new features.
Tips for Optimal Performance
Optimize your Yamaha RX-V367’s sound quality by ensuring correct speaker placement, using the calibration tool, and minimizing obstructions. Proper component placement and avoiding vibrations also enhance performance.
9.1 Positioning Speakers for Best Sound Quality
Positioning your speakers correctly is crucial for achieving optimal audio performance with the Yamaha RX-V367. Place front speakers at ear level, angled inward, and ensure proper distance from walls. Subwoofers should be placed in a corner to enhance bass response. Surround speakers should be slightly above ear level and angled down towards the listening area for immersive sound distribution. Experiment with placement to optimize clarity and balance, ensuring all channels are synchronized and free from interference. This setup ensures a balanced and immersive listening experience.
9.2 Calibrating the Audio System
Calibrate your audio system for optimal performance using the Yamaha RX-V367’s built-in calibration tool. Adjust speaker levels, distance, and crossover settings to ensure balanced sound; Use the remote to fine-tune settings and ensure proper synchronization across all channels. Regular calibration ensures immersive audio and enhances overall listening experiences. Refer to the manual for detailed step-by-step calibration instructions.
Warranty and Customer Support
Yamaha offers a 1-year warranty for the RX-V367. For support, contact Yamaha’s customer service or visit their website for troubleshooting guides and repair options.
10.1 Understanding the Warranty Terms
Yamaha provides a 1-year limited warranty for the RX-V367, covering manufacturing defects. Warranty terms vary by region; register your product for extended support. Damage from misuse or unauthorized repairs is excluded. Retain your purchase receipt as proof of ownership. For full details, refer to the warranty section in the manual or visit Yamaha’s official website.
10.2 Contacting Yamaha Customer Support
For assistance with your Yamaha RX-V367, visit the official Yamaha support website. Use the “Contact Us” section to find regional support phone numbers and email addresses. You can also submit inquiries online or consult the user manual. Yamaha’s customer support team is available to address technical issues, warranty inquiries, and provide repair or maintenance guidance. Ensure to have your product details ready for efficient help.

Safety Precautions and Guidelines
Ensure proper handling to avoid damage or injury. Avoid exposure to extreme temperatures, moisture, or power surges. Follow all safety warnings in the manual carefully.
11.1 Important Safety Information
Read this section carefully to ensure safe operation. Avoid exposure to water, extreme temperatures, or physical stress. Use genuine Yamaha parts and follow installation guidelines to prevent damage or injury. Keep the device away from children and flammable materials. Always unplug during lightning storms and follow proper power handling procedures to maintain safety and functionality.
11.2 Handling and Storage Guidelines
Handle the receiver with care to avoid physical stress or damage. Store it in a dry, cool place away from direct sunlight. Use the original packaging for safe transport. Avoid stacking heavy objects on the device. Keep it upright to prevent internal component damage. Regularly clean dust from vents for proper airflow and ensure firmware is updated before long-term storage.

Additional Resources and References
Access the full Yamaha RX-V367 user manual PDF, quick start guides, and safety brochures on Yamaha’s official website or trusted manual directories for further assistance.
12.1 Accessing the Full User Manual PDF
The Yamaha RX-V367 user manual is available as a PDF download from Yamaha’s official website or trusted directories like Manuals.co.uk. The 57-page document covers all features, setup, and troubleshooting. Regional versions, such as the European or North American manuals, ensure compatibility with local specifications. Additional resources include quick reference guides and safety brochures for comprehensive support. Download the PDF here for detailed instructions and optimal use of your receiver.
12.2 Finding Online Tutorials and Guides
Online tutorials and guides for the Yamaha RX-V367 are available on Yamaha’s official website and platforms like YouTube. These resources provide step-by-step instructions for setup, troubleshooting, and advanced features. Additionally, forums and tech support websites offer user-generated tips and detailed walkthroughs. Visit Yamaha Support or ManualsLib for comprehensive guides to enhance your experience with the receiver.